Monday, 20 November 2017

Animation 1 - Group Project Stop Motion Film


 Team Member's Blog Links: 


Yoori Kim: yoorikimblog.wordpress.com

Jiun Wee: shwuweevisualart.wordpress.com


Sunday, 12 November 2017

3D Artistry 2 - Wk 14 - Journal

Lights


I had to make a few changes to the light fittings because it looked too heavy and bulky. Also, the corridor was too bright so I also removed a couple of lights as well.

Cameras


In addition, as I was following the mud-map, the camera was too close to the character and it did not follow the story board. But with a simple change to the mud-map (adding another hallway and moving the camera back), the camera now follows the story board.


Blocking Animation 


I have finished animating my character but, the animation was too long (about a minute long) and if I move a group of key frames back using the graph editor, then the character and camera key frames will be out of sync. So what I did was go back to my storyboard animatic and timing how long is each scene. For example the first scene is 1 second, the second scene is 2 seconds and so on. Then I implement that into keyframes for the playblast camera, then keep the keyframes for the character with that time frame.


3D Artistry 2 - Wk 12 - Journal


UV Mapping 


Using the Lambert Material helped a lot especially for the head of my character model. Once I was done sewing and sticking together shells, I coloured the shells using Photoshop. 


When I went back to my model, it turned out wrong. So I went back to the UV Editor and it reset itself. I realised that I forgot to optimise the UV shells and had to do another one.  


3D Artistry 2 Wk 11 - Journal


Grey Boxing and Layout of the Environment


I add two textures, one for the floor and one for the chair. The floor texture was too brown so I used Photoshop to edit the texture a bit. I ended up using a purple highlight layer and a black overlay layer for my new floor texture. For the walls, I used a purple to dark purple gradient and used the marquee tool to add stripes.


Rigging 


I was able to figure out that the problem with my spine control was that I needed to put the control into a buffer and parent constraint the buffer and the joint. Then delete the constraint and move the control. 
Other then that, I was finally done with my rig. 


Thursday, 19 October 2017

Animation 1 - Wk 11 - Group Project Production


For the group project, we original had 3 members, me, Jiun and Yoori. When coming up with the animation for the theme cooperation, our main concern was come up with a concept that was simple and was 30 seconds long. So, we all just said some random idea until we came up with a bunch of letters spelling the word ‘cooperation’ as they are cooperating to save the letter y and Jiun ordered some fridge magnets.

While coming up with the storyboard, Spencer came into our group and we end up creating our own version of how the story world process and choosing the shots that looked the best for that scene. In addition, we all contributed on creating the design of each character. I designed C, P and E, Jiun designed R, A and Y, Yoori designed OO and I and Spencer designed T, O and N. Once we had our storyboard, me and Jiun started cleaning up the storyboard using photoshop, Yoori used premiere pro to edit the storyboard to be 30 seconds and Spencer was supposed to make the character sheet on photoshop, but he ended up not doing anything since he didn’t have access on the computer, so Yoori ended up creating the character sheet.


During this week’s lesson, Spencer was not here and was not replying to any technological form of communication, so we had Guy as a replacement. Jiun was the one who designed the production plan and told us that she will transfer the plan onto a website called ‘Trello’. Also, since the magnets did not arrive this week, we decided to start animating the character’s eyes. Me, Jiun and Yoori started animating the character’s eye to make them blink while Guy, since he has no knowledge of the program photoshop, ended up making the ‘Let’s Rescue’ sign for the film. I animated C, P, E, O, X and T eye’s blinking animation, Yoori animated OO, I, N, Z and A, and finally Jiun animated Y and R. 

For next week, we plan to start shooting the stop-motion and then edit the images so the letter have eyes and finally, if we have time, add voice recording and music.  

Sunday, 1 October 2017

Animation 1 - Wk 9 - My Experience with Hand-Drawn and Stop-Motion Animation


 In my experience of both hand drawing and stop-motion animation, I found that both are used differently to achieve the same result. Some of these differences have their benefits and drawbacks. I will be using my hand drawing flip-book and my stop-motion video as my two examples.

While animating this, I started with a circle and then slowly added more features and detail so it looks like a girl transforming. I was able to blur out the character and make the character do a flip with little effort. If I were to animate this as a stop-motion video, I would either have to switch the model into a blur or frame by frame make the character do a flip. Also, I am able to squash and stretch my character to make the motion look realistic but if I were to do a stop-motion, I cannot squash nor stretch the character, and even if I did, the model would deform and will take time to re-position and model the character again. Furthermore, if you were to make a mistake such as the character moves too fast or too slow, you can remove frames or draw more frames, however, for stop-motion, you need to start all over again. Finally, the character is in the air so if I were to use a model, then I would also need a support stand to make the character stay in the air then, later edit each frame using an editing software such as ‘Photoshop’.

What’s good about doing stop-motion animation is that I position the object then once I’ve taken the photo, I sightly move the object depending if the action is fast or slow. In other words, I don’t have to redraw the same object/model. Same applies to moving arms or legs, I only need to make the arms or limbs slightly instead of redrawing the whole model again on a different page. Another thing is that the model already have shadows due to the light in the room or the sunlight, but for drawing, I need to shade each frame from the direction I want to put the light in. Finally, for drawing I can only flip through three pages to make sure the character action goes smoothly, for stop-motion animation however, I just need to look through my camera or phone and I can see all the frames I’ve taken.


All in all, both hand drawing and stop-motion animation have their benefits and drawbacks but are used differently to achieve the same result. 

3D Artistry 2 - Wk 9 - Journal


2D Animatic


This was actually my second attempt of making the animatic. My first attempt didn’t follow the brief since it took place outside then a room. Also, the shots looked off and felt uncomfortable especially the close ups so I had to start all over again. It was an improvement but I needed to do a slight change in the shot where the character opens the door, which is just making the character look to their left. Later on, I will add shading and colour so I know both the colour scheme and the position of the lights.


Mud-map, Grey Boxing and Layout of the Environment


I have a good idea of the environment and decided for the environment to be a haunted house to fit part of my character’s story. I wanted to do a simple room and add not too much furniture. I have finished grey boxing the environment and decided to add some books on the shelf so it doesn’t look too empty.


Colour scheme and Texturing for Animatic


I do have the colour scheme for my character but not the layout. My plan is to make the environment purple to complement the orange glow my character has. I will also be using some textures to make the wood floor and the material of the chair.


Cameras and lighting


I do have a couple of cameras position to look like the 2D animatic but I do not have lighting. I’ve been having trouble with lighting the scene such as the ceiling lights does not have good lighting so I will need to work on that.


Modelling and Rigging Character

I apparently put too much detail to my character and had to simplify my character such as removing the pads and gadgets. I also had to separate the fur on the coat so it does not deform my character model. I am having trouble rigging my character. I did look at the video Michael linked to but the controls always rotate wrong. For example, Y rotate is the X rotate, X rotate is the Z rotate and if I try to change the rotations, the controls are backwards. All in all, my greatest challenge for my animatic is Rigging my character, as I am having trouble with the spine and hip controls.


Friday, 15 September 2017

Animation 1 - Wk 8 - Stop-Motion Exercise 2


Created by: 
Mareena Iqbal 
Yoori Kim
Jiun Wee
Emily Gear 

Although my group had more props last time, we didn't have a tripod and ended up using a box and plasticine as a replacement. We all did work and cooperated effectively as my group changed roles from moving the animals to cameraman but I stayed with moving the Lego figures so the figure move at a same pace. But I felt like the video is moving too fast. Both the Lego figure and the animals are walking too fast. Also, the camera is cutting too fast and sometimes made me dizzy. For improvement, I'll work on the lighting since it is constantly changing and be patient and move the figure slowly. For example, in the first scene, instead of 12 frames, I'll try 24 frames so the figure looks like its walking and not running.

Animation 1 - Wk 7 - My own Animated Piece


Stop-Motion Animation 


The reason why I choose this technique was because I didn’t have a lot of materials and I didn’t have anyone to help make the animation. So, I have to come up with a concept for this animated piece that is simple and ended up using coins and my hand for this entire short animation piece. I found twp principles of animation in my piece and they are anticipation and slow in and slow out.

Anticipation is also a principle that was highlighted in my animation piece when the hand is about to hit the coin. Anticipation is when a character is preparing an action so the audience an idea of what’s about to happen next.  When the hand makes a fist and is raised up, it’s preparing an action; so, the audience knows that it will try to smash the coin.

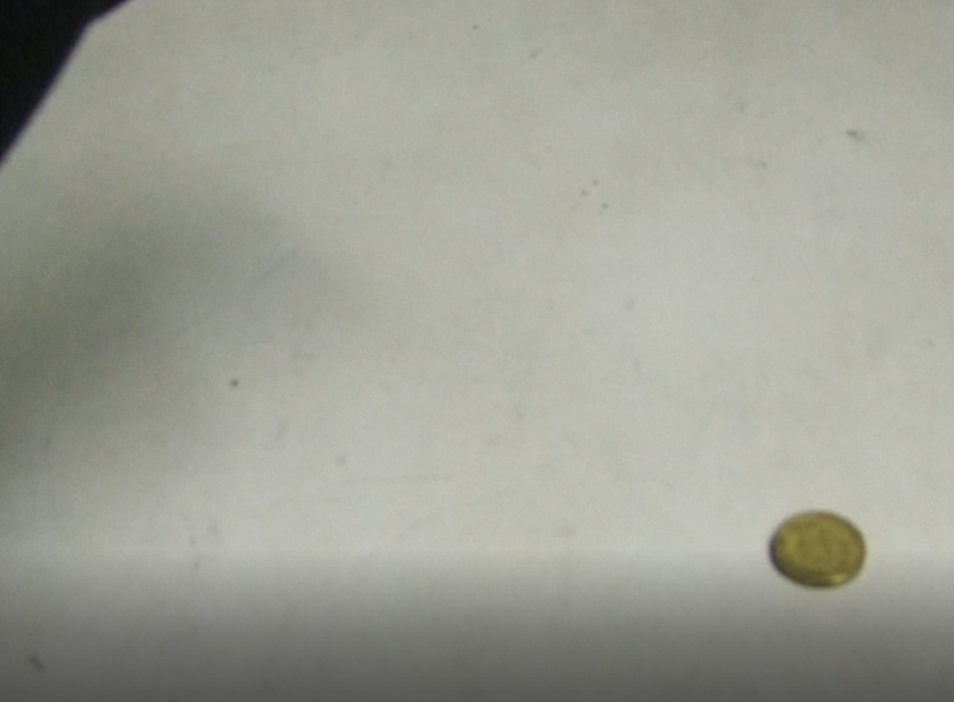
Slow in and Slow out was used whenever the coin moves fast. This is referred to all movement starting slowly, builds up speed then finishes slowly again.  If the video was slowed down, you will notice that the coin moves back before moving fast then slows down again and moves back. This makes the coin move natural.


In conclusion, only two principals of animation were highlighted in my piece and they were anticipation where the hand is raised and slow in and slow out wherever the coin moves as it slowly backs up then moves fast and finishes slow again. 

Animation 1 - Wk 7 - Peter Gabriel's Music Video Analysis


In Peter Gabriel’s music video of “Sledgehammer”, there were three different animation techniques. The techniques were Claymation, Pixilation and Stop-motion animation.
Claymation is when each animated piece (background or character) is made out of a workable material, manly plasticine. In the music video, they used plasticine to model Gabriel’s face and frame by frame, move the model slightly. They also add extra materials such as, hammer for hands and legs on his face. They also do this to the background when adding a window or changing colour from green to red.

Pixilation uses live actors as a frame by frame subject and move vaguely frame by frame for movement. This technique has been used throughout the majority of the music video using different props such as a train set around Gabriel’s head or a roller coaster ride on a chalk board.

Stop-motion animation is used on an object so it appears to move on its own. The object can be both animate like a puppet or in-animatic object like coins when used in animation. The music video used in-animate object such as fruits to animate Gabriel’s face and slightly move the fruits to match with Gabriel’s singing. They also used this with chicken meat to make it dance.


All in all, in Peter Gabriel’s music video, “Sledgehammer” the techniques all used different materials to animate. Claymation used plasticise to add items like legs on face and to change the colour of the background. Pixilation was used the most throughout the whole video and used props like a chalkboard as a roller coaster ride. Finally, stop-motion animation is used to animate inanimate objects like fruit and chicken to look like it moves.


Animation 1 - Wk 7 - Stop-Motion Exercise


When animating the stop-motion exercise, there were not a lot of materials available; just a bunch of animals, one small car, some blu-tack and a tripod. So, when discussing the idea of the stop-motion, we just thought of a bunch of funny action such small animals being chased by the bigger animals and the bigger animals being chased by a small car. We did have a lot of fun animating this exercise and everyone in the group cooperated effectively. When it came time to edit using premiere pro, we agreed that 2 frames were too fast and change it to 3-4 frames. There some problems like the changing of light and the camera shakes a lot in the video. What would have been better is finding a better source of light and to not shake the camera too much.  

Animation 1 - Wk 6 - Flipbook


This flip-book was an improvement from my last one. I still had to come up with a concept for this piece but it didn't require a lot of thinking. Instead of pose to pose drawings for this flip-book, I did it straight ahead. It made the animation look smooth but the only issues I have when animating is when the character either shrink or grow. 

Tuesday, 29 August 2017

Animation 1 - Wk 5 - Animating cycles

 Walk cycle


 I originally wanted to try animating a walk cycle traditionally, however it got to a point where each frame was either bigger or thinner than the others. Also, flipping the pages got difficult and I lost track of the next key frame. In addition, its hard to pinpoint on the next frame and to either do 12-frames per second or 24 frames per second. For a solution, I would work on how to flip the pages easily and put less paper on the clipboard to not lose track.


Dog Running In a Circle


Although I wasn't able to do a walk cycle digitally, I decided on a dog running in a circle cycle. It was easier to do the animation on the computer because I was able to organise and keep track using layers in Adobe Animate CC 2017 ( Adobe Flash). It was actually easier and faster to work then working traditionally.

Animation 1 Wk 3 - Animating Fire


I decided for my next animation, I would animate fire but, as I kept animating and flipping through each frame, I realised that the fire was getting wider and didn't act like how fire would. For a solution, I would look at some reference of fire and how it moves and spreads.  

Animation 1 Wk 2 - Head Turning


It was very easy to make the head turn by drawing a circle making sure it matches and then started drawing the face structure, then the eyes and ended by drawing the nose. It took 8 pieces of paper in-order to make the cycle. However, while editing the video, the shots are not straight and accurate so I had to move some of the images to create a head turning cycle. I wanted to scan the pages using a scanner but I do not have one and had to improvised using my phone.

Sunday, 13 August 2017

Animation 1 Wk 2+3 - Reflection on Exercises/Homework


Your second blog post is to reflect on one or more of the animation exercises done in class and in homework that have challenged you the most.  


While animating the flipbook from week 2, the most challenging part of the exercise was coming up with the concept. At first, I did simple thumbnails and character designs for the flipbook but I didn’t know where to place the camera for the scene and end up trashing the scene and moving on to a different idea. I ended up doing a simple transformation from a girl to a mutant creature and after getting the thumbnails ready, I split the flipbook in half leaving 50 leaves for each. I used one of them as a rough practice sketch for keys and in-between and once I was happy with the result, I copied it over the other flipbook so I don’t have to keep erasing a messing up the flipbook.  


 Another challenge in class was do a head turn of a character. What was challenging about was getting the nose right since there was no reference of the character and I ended up with a deformed nose. I did multiple attempts but all didn’t fit the character head turn. Also, I had trouble flipping the pages and ended up with creases and damaged paper.

Saturday, 29 July 2017

Animation 1 Wk1 - Courage the Cowardly Dog


In your first blog post, summarise your recollections in a short paragraph, and reflect on how it has shaped your interest in animation study.  You may include one image if you wish.


- created by John R. Dilworth for Cartoon Network


It was not the animation that got me interested in animation studies, it was the characters such as Courage, Muriel Bagge and Eustace Bagge. Each character had unique design, shape and personality and no character were alike. For example, Shirley the medium is a fortune-teller who cast curses on those who disobey integrity. However, she is also very greedy and charges high fees in order to reversed the curse on the subject. Also, her design and colours are very fitting to her character, with her green skin matches her greedy persona.
It has inspired me to creating my own characters and shape my interest in animation studies.

Monday, 12 June 2017

Visual Arts Wk14 - Study Week


Using Charcoal (Conte A and 2B)

For Study Week, Nelson showed how to draw portraits using simple shapes. As I was drawing the eyes, I felt that the eyes were too big but I realise that people have different shapes and sizes such as longer eye brows and big eyes or small eyes and big noses. I want to focus more on drawing a variey of eye shapes in the future.  


Using Charcoal (Conte A and 2B)

This was my best skull drawing I made during this semester.What I should have done is remove the structure lines so the drawing is more clean and also, work more detail on the neck bone. I would like to continue improving on drawing details of the skull. 


Using Charcoal (Conte A and 2B)

This is my second time drawing a portrait and it turn out better than I expected. I feel like I made both the nose and lips too big but, other than that I think I've improved dramatically. The shading of the face got easier thanks to the charcoal. For further improvements, work more on not making the nose and lips too big and work more on hair and using structure lines.  


Saturday, 3 June 2017

Visual Arts Wk13 - Life Model Drawing Female 4 (Classwork)


Using Marker

From my last animation drawing, this is a big improvement. I have fit most of the frames in one page which is what I was aiming for. I would like to work on my drawing speed for the 30 second figure drawings. 


Using Marker and Charcoal

Another good improvement on my last life drawing. On the first drawing, I had added composition to the drawing in order to tell a story. I wanted to add facial however wasn't able to finish the feet on the send drawing. I want to keep improving on facial features and drawing speed. 


Using Marker and Water Colour

A massive improvement on my last water colour drawing. I wanted to test to if I can add more than two colours however, did not turn out so good. The second attempt was more better but I made her chest too big. What I do like however in this drawing is how I draw the face on the second figure. All in all for improvement, I want to work more on water colours.


Sunday, 28 May 2017

Visual Arts Wk12 & 13 - Character Design + Turnaround (Homework)


The hardest part about this drawing was the character design itself. I had made a number of concept of characters but none of them I liked so I just went with this design. The turnaround was a bit difficult since I had to repeatedly make the same character with different side positions but a good practice for drawing regardless. I used Photoshop so I can decide what combinations of colours worked best and picked the best one.